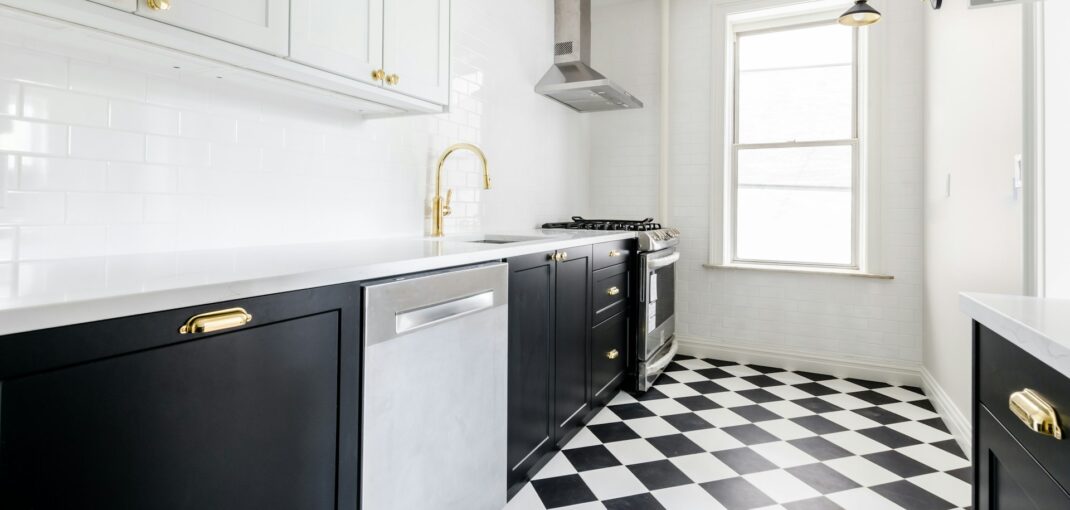
When it comes to upgrading your home’s flooring, tile flooring is an excellent choice for both durability and aesthetics. Whether you’re laying ceramic tile or natural stone, the process of installing tile floors requires precision and attention to detail. This guide will walk you through the steps necessary to achieve a flawless finish, from preparing your tile surface to applying the final grout.
Preparation is Key
Before you begin installing tile floors, preparation is essential. Start by gathering all the necessary tools and materials, including tile spacers, a rubber mallet, grout haze remover, and a good supply of clean water. Ensuring that your workspace is clean and organized will save you time and frustration down the road.
Next, prepare the tile surface. The surface must be level, clean, and dry before you begin laying tile. This will help prevent issues like uneven tiles or grout lines that don’t align properly. If you’re working with a subfloor, make sure it’s sturdy enough to support the tile and won’t shift or crack under the weight.
Finding the Center Points
Finding the center of the room is a crucial step in achieving a balanced and visually pleasing tile layout. Start by measuring the room’s width and length and marking the center points on the floor. Use a chalk line to connect these points, creating a cross that divides the room into four equal quadrants. This will serve as your guide for laying tile, ensuring that the tiles are evenly distributed across the space.
Laying the Tile
Begin at the center of the room, where the two chalk lines intersect. This is where you’ll lay your first tile. Apply the tile adhesive with the side of the trowel, spreading it evenly over a small area. Press the tile firmly into the adhesive, using a rubber mallet if necessary to ensure a secure bond.
As you continue to lay the tile, place tile spacers between each tile to maintain consistent grout lines. This will help prevent the tiles from shifting as the adhesive dries. Work in small sections, checking periodically to ensure that the tiles are level and aligned with the chalk lines.
For a more dynamic look, consider laying the tiles at a 45-degree angle to the room’s walls. This diagonal pattern can add visual interest and make a small room appear larger. However, keep in mind that this approach requires more cutting and precision.
Cutting Tiles
When you reach the edges of the room or encounter obstacles like doorways or cabinets, you’ll need to cut the tiles to fit. Use a tile cutter or a wet saw to make precise cuts. Always measure twice before cutting to avoid mistakes.
Applying the Grout
Once all the tiles are in place and the adhesive has had time to set—typically 24 hours—you can move on to applying the grout. Start by removing the tile spacers and cleaning any excess adhesive from the tile surface.
Mix the grout according to the manufacturer’s recommendations. Using the side of the trowel, apply the grout over the tiles, pressing it into the grout lines at a 45-degree angle. Be sure to work the grout thoroughly into the spaces between the tiles to prevent gaps or air pockets.
After applying the grout, use a damp sponge to wipe away any excess grout from the tile surface. Rinse the sponge frequently in clean water to avoid spreading grout residue. It’s important to work carefully to avoid disturbing the grout lines while cleaning the tiles.
Addressing Grout Haze
After the grout has dried—again, usually within 24 hours—you may notice a hazy film on the tile surface. This is known as grout haze, and it’s a common occurrence when installing tile floors. To remove it, use a grout haze remover or a mixture of clean water and white vinegar. Apply the solution with a soft cloth, then buff the tiles to restore their shine.
Final Touches
Once the grout has fully cured, typically after 72 hours, you can add the finishing touches to your new tile floor. Seal the grout lines with a grout sealer to protect them from moisture and stains. If you’ve installed natural stone tiles, you may also want to apply a stone sealer to protect the tile surface.
Lastly, inspect the entire floor for any remaining excess grout or adhesive. Use a small tool, like a utility knife, to carefully clean up any imperfections. Your tile floor installation is now complete, providing your home with a durable, attractive surface that will last for years to come.
By following these steps and paying attention to detail, you can achieve professional results, whether you’re a seasoned DIYer or a first-time installer. Remember, every tile floor installation is unique, so take the time to plan carefully and consult the manufacturer’s recommendations for the specific tile you’re using. Whether you’re working with ceramic tile or natural stone, proper installation will ensure that your new floor is both beautiful and functional.